Tutorial How To Make An Interactive Grass Shader In Unity
You will learn how to write a geometry shader to generate blades of grass and make it interact with objects moving through it.
This tutorial is a step-by-step guide on how to add interactivity to the grass shader. It is the extension of the geometry grass shader tutorial by Roystan. Here I would like to show how to improve it with a very simple interactivity example. The shader will take the position and radius of the interacting object and apply displacement for the closest grass blades.
As a starting point, you can use my code available on GitHub. Or you can complete Roystan’s tutorial yourself and get the same result as my code. I would recommend you do it as it is a very detailed step-by-step guide on how to generate grass blades in the geometry shader. The only difference with my code is that I have not added lighting, shadows, and therefore normals for the sake of the simplicity of the effect code.
MonoBehaviour Component
Let’s start with passing parameters from an object to the shader. The position and radius of a game object that can interact with the grass should be passed into the shader so it can react accordingly. For that you need to create a simple MonoBehaviour component that has a reference to the grass material and passes the _Trample property to the shader each frame:
[ExecuteInEditMode]
public class GrassTrample : MonoBehaviour
{
    [SerializeField] private Material material;
    [SerializeField] [Range(0, 10)] private float radius;
    [SerializeField] [Range(-1, 5)] private float heightOffset;
    private Transform cachedTransform;
    private readonly int grassTrampleProperty = Shader.PropertyToID("_Trample");

    private void Awake()
    {
        cachedTransform = transform;
    }

    private void Update()
    {
        if (material == null)
        {
            return;
        }

        var position = cachedTransform.position;
        material.SetVector(grassTrampleProperty, new Vector4(position.x, position.y + heightOffset, position.z, radius));
    }
}
Add this component to the game object that will interact with the grass and add a reference to the material that the grass plane is using via inspector and GrassTrample serialized field material.
Shader
Properties
Now let’s modify the GrassShader.shader file. Add the following properties to the shader properties block:
Properties
{
    ...
    [Header(Wind)]
    _WindDistortionMap("Wind Distortion Map", 2D) = "white" {}
    _WindFrequency("Wind Frequency", Vector) = (0.05, 0.05, 0, 0)
    _WindStrength("Wind Strength", Float) = 1

    [Header(Trample)]
    _Trample("Trample", Vector) = (0, 0, 0, 0)
    _TrampleStrength("Trample Strength", Range(0, 1)) = 0.2
}
_Trample is passed from the MonoBehaviour component. And _TrampleStrength would allow us to tune the effect’s strength.
Then add the same properties into the CGINCLUDE block:
CGINCLUDE
#include "UnityCG.cginc"
#include "Autolight.cginc"
#include "CustomTessellation.cginc"

...

sampler2D _WindDistortionMap;
float4 _WindDistortionMap_ST;
float2 _WindFrequency;
float _WindStrength;

float4 _Trample;
float _TrampleStrength;

struct geometryOutput
{
	float4 pos : SV_POSITION;
	float2 uv : TEXCOORD0;
};

...
Grass Interaction
We start with grass piercing the object:
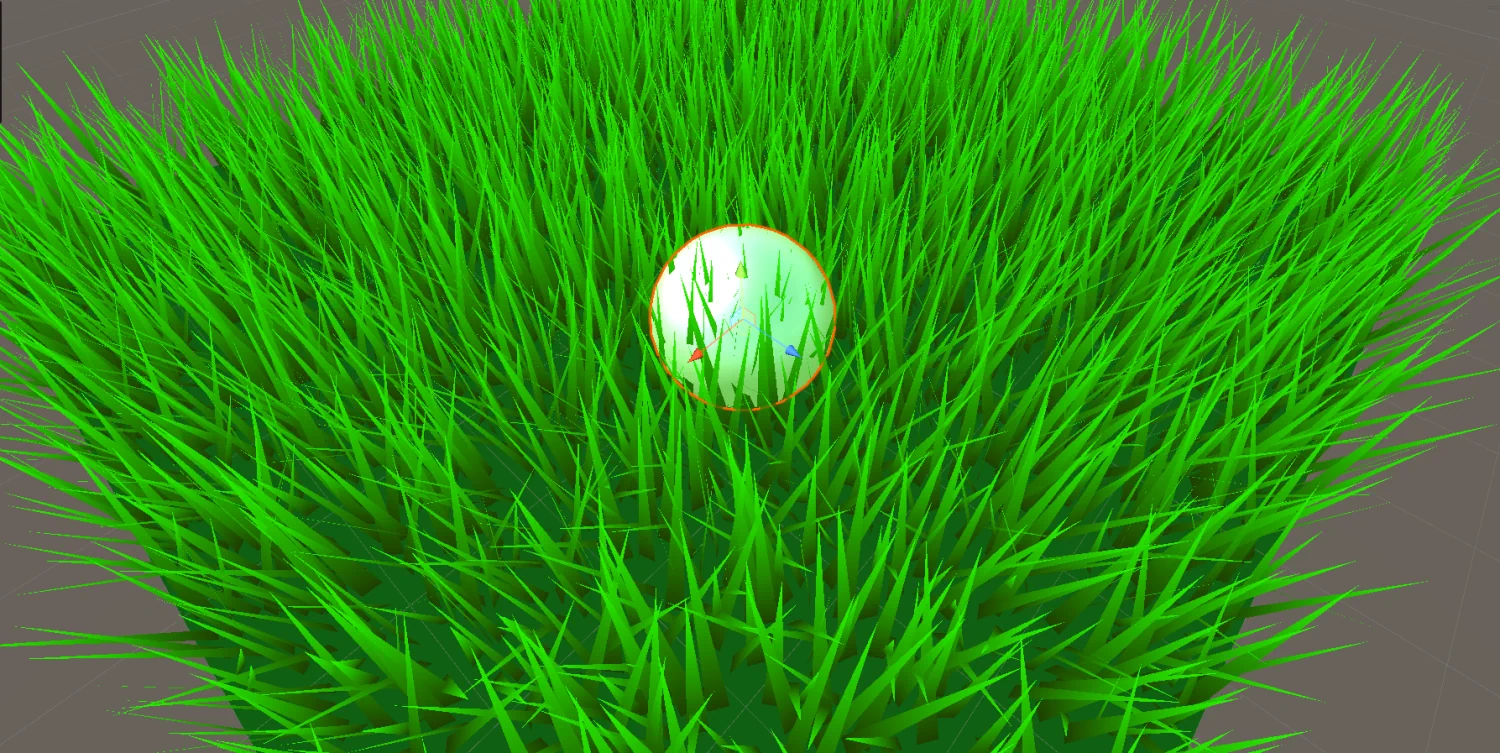
Now let’s modify the grass blade generation algorithm to add interaction. In the first iteration, we can find the direction in which we should move each vertex. To do it we should take the current vertex position and subtract the trample position. Then multiply the result with the _TrampleStrength property to control the strength of the effect.
void geo(triangle vertexOutput IN[3] : SV_POSITION, inout TriangleStream<geometryOutput> triStream)
{
    ...
    for (int i = 0; i < BLADE_SEGMENTS; i++)
    {
        float t = i / (float)BLADE_SEGMENTS;
        float segmentHeight = height * t;
        float segmentWidth = width * (1 - t);
        float segmentForward = pow(t, _BladeCurve) * forward;

        float3x3 transformMatrix = i == 0 ? transformationMatrixFacing : transformationMatrix;

        float3 trampleDiff = pos - _Trample.xyz;
        pos += trampleDiff * _TrampleStrength;

        triStream.Append(
            GenerateGrassVertex(pos, segmentWidth, segmentHeight, segmentForward, float2(0, t), transformMatrix));
        triStream.Append(
            GenerateGrassVertex(pos, -segmentWidth, segmentHeight, segmentForward, float2(1, t), transformMatrix));
    }

    triStream.Append(GenerateGrassVertex(pos, 0, height, forward, float2(0.5, 1), transformationMatrix));
}
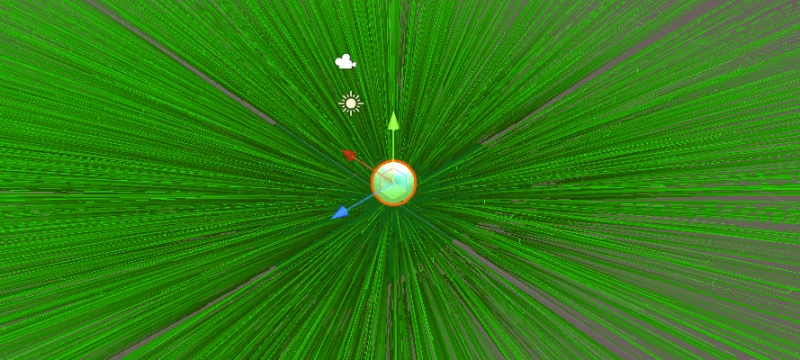
It is something already, grass is pushed around the object, but not quite what we are looking for. Let’s normalize trampleDiff to make it of length 1, to avoid the further vertices being pushed even further away from the object.
float3 trampleDiff = pos - _Trample.xyz;
float4 trample = float4(
    float3(normalize(trampleDiff).x,
           normalize(trampleDiff).y,
           normalize(trampleDiff).z),
    0);
pos += trample * _TrampleStrength;
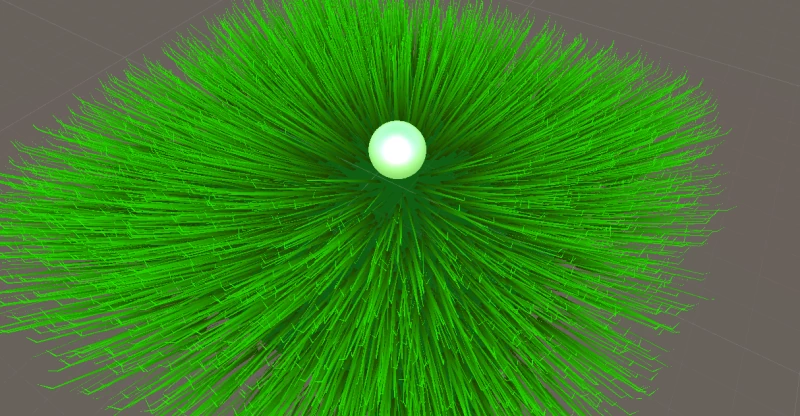
Already looks kinda better, but we need to use the radius of the game object to affect only the closest grass blades. To achieve that, we can multiply the trample vector by
(1.0 - saturate(length(trampleDiff) / _Trample.w))
_Trample.w is the radius of the object, so we divide the length of tramplleDiff by the radius and clamp it between 0 and 1 using the saturate function. So if the length of trampleDiff is bigger than the radius, then the result of the division would be more than 1. But we need the multiplier to be 0 in such cases since the effect should not be applied if the length is bigger than the radius. So we invert the multiplier after it is clamped by subtracting it from 1.0. Therefore the closer the position of our object to the current vertex the closer the value to 1.0. Finally, multiply the vector by this value to get a gradual displacement of vertices around the position of our object.
float3 trampleDiff = pos - _Trample.xyz;
float4 trample = float4(
    float3(normalize(trampleDiff).x,
           normalize(trampleDiff).y,
           normalize(trampleDiff).z) * (1.0 - saturate(length(trampleDiff) / _Trample.w)),
    0);
pos += trample * _TrampleStrength;

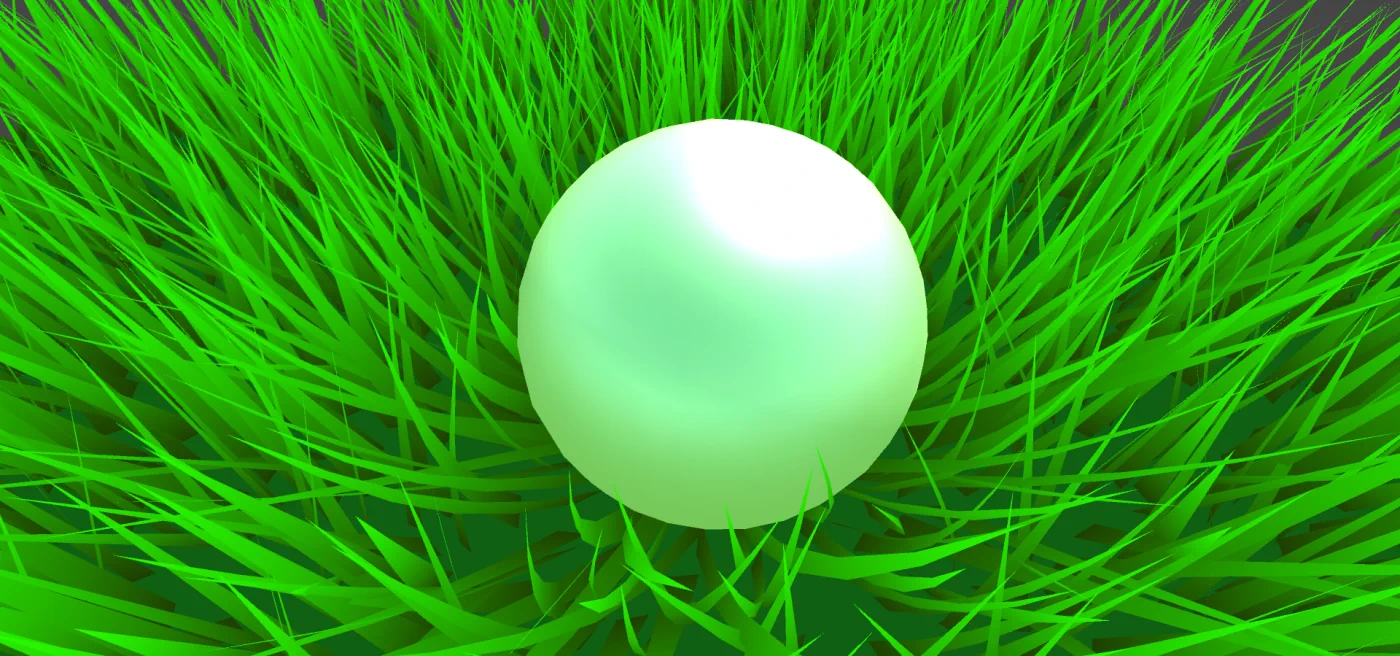
Much better, grass now bends around the ball.

But it is also pushed below the plane, so we should just use 0 instead of the Y component and that’s it.
float3 trampleDiff = pos - _Trample.xyz;
float4 trample = float4(
    float3(normalize(trampleDiff).x,
           0,
           normalize(trampleDiff).z) * (1.0 - saturate(length(trampleDiff) / _Trample.w)),
    0);
pos += trample * _TrampleStrength;

Now the first segment of a grass blade does not clip through the plane when affected by the object.
Previously it was not that visible, but if the radius is set to be bigger, then we can notice that tips are pointed directly upwards.

To fix this we also need to calculate the trample for the tip to displace it too. Add the same code after the loop.
[maxvertexcount(BLADE_SEGMENTS * 2 + 1)]
void geo(triangle vertexOutput IN[3] : SV_POSITION, inout TriangleStream<geometryOutput> triStream)
{
	...

	for (int i = 0; i < BLADE_SEGMENTS; i++)
	{
		...
	}

    float3 trampleDiff = pos - _Trample.xyz;
    float4 trample = float4(
        float3(normalize(trampleDiff).x,
               0,
               normalize(trampleDiff).z) * (1.0 - saturate(length(trampleDiff) / _Trample.w)),
        0);
    pos += trample * _TrampleStrength;
    triStream.Append(GenerateGrassVertex(pos, 0, height, forward, float2(0.5, 1), transformationMatrix));
}
Instantly looks much better now when the radius is big.

Let’s also follow the DRY principle and remove code duplication by extracting the calculation into a separate method.
float4 GetTrampleVector(float3 pos)
{
    float3 trampleDiff = pos - _Trample.xyz;
    return float4(
        float3(normalize(trampleDiff).x,
               0,
               normalize(trampleDiff).z) * (1.0 - saturate(length(trampleDiff) / _Trample.w)),
        0);
}

[maxvertexcount(BLADE_SEGMENTS * 2 + 1)]
void geo(triangle vertexOutput IN[3] : SV_POSITION, inout TriangleStream<geometryOutput> triStream)
{
    ...

    for (int i = 0; i < BLADE_SEGMENTS; i++)
    {
        ...

        float4 trample = GetTrampleVector(pos);
        pos += trample * _TrampleStrength;

        triStream.Append(
            GenerateGrassVertex(pos, segmentWidth, segmentHeight, segmentForward, float2(0, t), transformMatrix));
        triStream.Append(
            GenerateGrassVertex(pos, -segmentWidth, segmentHeight, segmentForward, float2(1, t), transformMatrix));
    }

    float4 trample = GetTrampleVector(pos);
    pos += trample * _TrampleStrength;
    triStream.Append(GenerateGrassVertex(pos, 0, height, forward, float2(0.5, 1), transformationMatrix));
}
If the plane’s position is (0, 0, 0), then everything will look fine here. But once the plane is moved, the trample effect stays in its previous place.
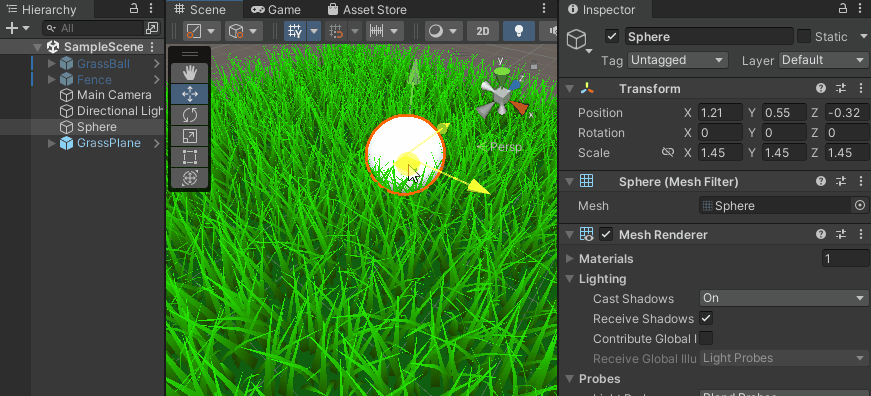
To accommodate for that we need to subtract the plane position from the trample position (if anyone knows a better way, feel free to share in the comments):
float4 GetTrampleVector(float3 pos, float4 objectOrigin)
{
    float3 trampleDiff = pos - (_Trample.xyz - objectOrigin);
    return float4(
        float3(normalize(trampleDiff).x,
               0,
               normalize(trampleDiff).z) * (1.0 - saturate(length(trampleDiff) / _Trample.w)),
        0);
}
float4 objectOrigin = mul(unity_ObjectToWorld, float4(0.0, 0.0, 0.0, 1.0));

for (int i = 0; i < BLADE_SEGMENTS; i++)
{
    float t = i / (float)BLADE_SEGMENTS;
    float segmentHeight = height * t;
    float segmentWidth = width * (1 - t);
    float segmentForward = pow(t, _BladeCurve) * forward;
    float3x3 transformMatrix = i == 0 ? transformationMatrixFacing : transformationMatrix;

    float4 trample = GetTrampleVector(pos, objectOrigin);
    pos += trample * _TrampleStrength;

    triStream.Append(
        GenerateGrassVertex(pos, segmentWidth, segmentHeight, segmentForward, float2(0, t), transformMatrix));
    triStream.Append(
        GenerateGrassVertex(pos, -segmentWidth, segmentHeight, segmentForward, float2(1, t), transformMatrix));
}

float4 trample = GetTrampleVector(pos, objectOrigin);
pos += trample * _TrampleStrength;
triStream.Append(GenerateGrassVertex(pos, 0, height, forward, float2(0.5, 1), transformationMatrix));
Now we get the correct displacement for grass blades nevertheless the plane position.

The effect already looks good, but under close inspection, you can see that the base of each blade is affected by the trample effect, and the grass is not only bent but also literally moved aside:

If this effect is used in the game with another camera setup and a general focus on the main character, then most likely no one will notice it, but I still want to tackle this issue. We want to remove the trample for the first blade segment. The naive approach would be adding the condition to not apply it and that’s it.
if (i < 0)
{
    float4 trample = GetTrampleVector(pos, objectOrigin);
    pos += trample * _TrampleStrength;
}
Or a more fancy way to do this. It should not have much difference performance-wise (you can read more on shader branching here or here, but do not believe me or anyone else undoubtedly, profile your code if it is a performance-critical section, your case could be an exception):
float4 trample = GetTrampleVector(pos, objectOrigin);
pos += trample * _TrampleStrength * saturate(i);

Now the base always stays in the same place and the effect looks better close-up.
Conclusion
It was my first attempt at writing at least some small shader effect myself. For many years I have been reading articles like the one listed at the beginning of the blog post, but never actually got down to write it following the tutorial, not speaking about extending it with additional effects or behavior.
As you can see the hardest task here is to break down the effect into smaller steps (like the line with the trample effect taking a good paragraph to describe). And then implementation of each step is a lot easier, definitely not as hard as it seems at the start. The art of decomposition of such effects can come only with experience and the number of shaders you have written, even following tutorials. So if you want to learn shaders just pull up your sleeves and try to implement effects from your favorite game or any effect you think looks cool.
The interaction I have added may look like an easy and simple task for experienced pals, but I love to see it working.

Share your thoughts about the tutorial in the comments or on Twitter. And if you would like to get more tips and interesting game dev articles follow my telegram channel where I post stuff I find interesting every day.
Source code
A git repository with full source code and the scene setup is available at GitHub. Or the direct link to the shader itself if you just wanna grab it or compare it with your result: GrassShader.shader
Further steps
As an improvement, you can add lighting and shadows. Again use Roystan’s tutorial to add it for unaffected grass and improve it to apply lighting to displaced grass blades.
Hi, This shader is not working on mac and iOS devices. Any idea how to make it mac (Metal API) compatible?
Hello, unfortunately Metal doesn’t support geometry shaders. More info can be found here: https://forum.unity.com/threads/geometry-shader-on-mac.1056659/
To make it work on Metal you have to use a compute shader, for example, this post gives more info about this approach: https://www.junhaow.com/2021/03/06/050_Stylized-Sky-grass-in-Unity/
Данный шейдер работает только с одним обьектом?
Yes, because it takes only one vector _Trample into account when calculating the displacement. Can be improved by passing an array of vectors
Thanks for the tutorial. Works great for one object, but i am trying to get it to work with multiple objects. But got kinda stuck on how to get it working. Anybody idea?
Thanks! With this shader, we can pass an array of trample points and apply each in a loop.
Or you can also take a look at another solution: https://medium.com/dotcrossdot/compute-shaders-grass-rendering-6916a9dd008e
It writes the positions of all moving objects into a texture (including a falloff of the interaction effect) and then samples it to add the displacement in the geometry shader. This approach can be used with my shader too.
I’m trying to implement the loop thing to make it work with multiple characters, but it’s not working for me, where should it be implemented to work propertly? Also should the grass trample script be attached to every interactable object or it just needs one for the whole scene?
Hello. I really liked the shader. Is it possible to do this on shader graph?
Hello, thanks!
Shader Graph doesn’t support geometry shaders out of the box, but I have found this article that tells how to do this https://gamedevbill.com/geometry-shaders-in-urp/
However the geo shader there is still written in HLSL.