How To Make A Retro VHS Effect Shader In Unity
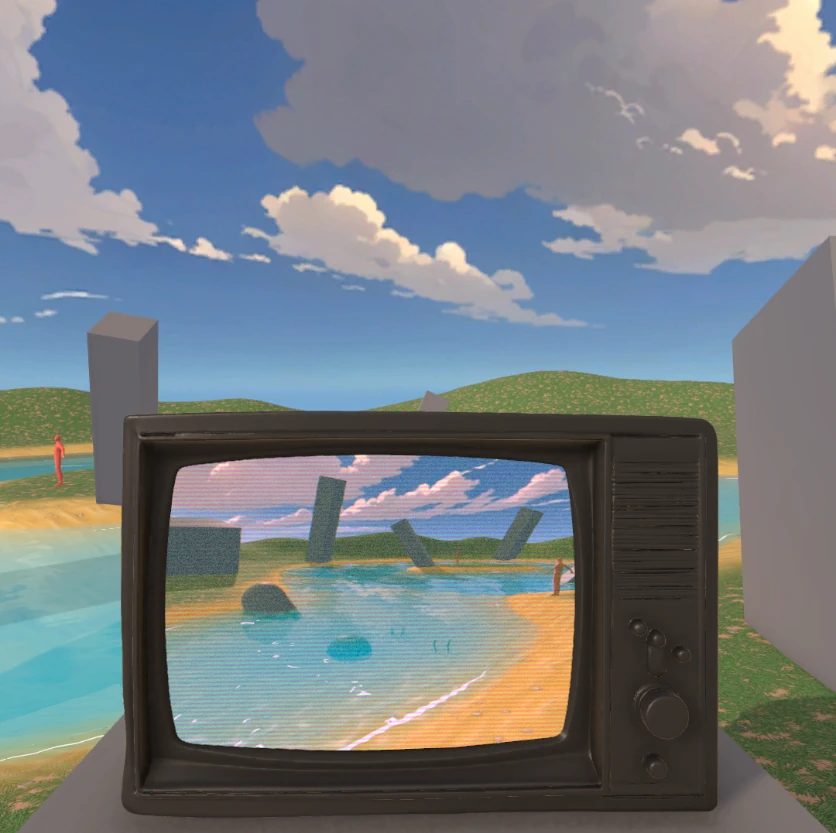
For my latest prototype, I wanted to evoke a sense of analog nostalgia, something gritty, unstable, and imperfect. The kind of mood you get from old surveillance footage, lost tapes, or 80s sci-fi intros. That’s where the VHS effect comes in.
A good retro look isn’t just visual polish, it helps set the tone. It instantly tells the player: this world is aged, haunted, or strangely familiar.
GitHub repo: github.com/AlexMerzlikin/Unity-VHS-Shader/
Here is the video breakdown where each effect is applied one by one
How the VHS Effect Shader Works: Step-by-Step Breakdown
1. Shader Properties
These define the input parameters and tweakable values for the shader, including the main render texture and effect intensities.
_MainTex: The main texture to which the effect is applied (a render texture in my case)._ScanlineIntensity: Controls how strong the scanlines appear._ScanlineCount: How many scanlines appear vertically._NoiseIntensity: Amount of noise on the image._ColorBleed: Intensity of the color bleeding effect (chromatic aberration)._Distortion: Strength of the horizontal wobble distortion._WobbleFrequency&_WobbleSpeed: Controls the speed and frequency of the wobbling distortion._TimeParam: A time value to animate effects like noise and wobble.
2. Vertex Shader (vert function)
- Transforms 3D vertices into clip space.
- Passes UV coordinates for texturing.
This part is standard and mostly just forwards texture coordinates for the fragment shader.
3. Fragment Shader (frag function)
This is where all the magic happens per pixel.
a) Sampling the Original Color
- Reads the pixel color from the main texture using UV coordinates.
fixed4 col = tex2D(_MainTex, uv);
b) Scanlines
- Creates horizontal scanline patterns using a sine wave based on the UV y-coordinate.
- The scanline effect modulates the pixel brightness vertically to simulate the classic VHS line flicker.
- Bright lines: Where the sine wave peaks (mask ≈ 1.0)
- Dark lines: Where the sine wave troughs (mask ≈ 0.7)
float scanline = sin(uv.y * _ScanlineCount * 3.14159);
float scanlineMask = lerp(1.0, 0.7, (scanline * 0.5 + 0.5) * _ScanlineIntensity);
col.rgb *= scanlineMask;
c) Color Grading
- Applies a slight desaturation by blending color towards grayscale.
- Colors become slightly less saturated (more muted), like old VHS tapes
- Adds a subtle blue tint to mimic the color tone of VHS playback.
float gray = dot(col.rgb, float3(0.3, 0.59, 0.11));
col.rgb = lerp(col.rgb, float3(gray, gray, gray), 0.15);
col.rgb = lerp(col.rgb, float3(0.9, 0.95, 1.1), 0.08);
Why These Values?
- Luminance weights
(0.3, 0.59, 0.11): These are the standard weights used in video/photo processing to convert RGB to grayscale, based on human eye sensitivity - Blue tint
(0.9, 0.95, 1.1): Simulates the cooler color temperature of old CRT displays and VHS tapes
d) Color Bleed / Chromatic Aberration
- Separates color channels and offsets the red and blue channels horizontally in opposite directions. The result is that colors are horizontally misaligned.
- Creates a slight color separation typical for VHS tapes.
- Blend intensity depends on pixel brightness.
- Bright areas: More color bleed (higher blendAmount)
- Dark areas: Less or no color bleed (lower blendAmount)
- Bright edges: Show color fringing (red on one side, blue on the other)
- Dark areas: Remain unaffected
float2 offset = float2(_ColorBleed / _ScreenParams.x, 0);
float r = tex2D(_MainTex, uv + offset).r;
float g = col.g;
float b = tex2D(_MainTex, uv - offset).b;
float3 aberrated = float3(r, g, b);
col.rgb = lerp(col.rgb, aberrated, blendAmount);
Why This Happens in Real Video
- Lens imperfections: Different wavelengths of light focus at slightly different points
- Signal processing: Analog video circuits can have slight timing differences between color channels
- Tape degradation: VHS tapes can develop color misalignment over time
e) Noise / Static
- Adds random noise varying over time.
- Simulates the grainy static noise VHS tapes produce.
float noise = (rand(uv * _TimeParam * 0.5 + _TimeParam) - 0.5) * _NoiseIntensity;
col.rgb += noise;
f) Distortion / Wobble
- Applies a horizontal sine wave displacement to UV coordinates. Then, the texture is sampled using the distorted UV coordinates.
- Creates the subtle wobble and image distortion seen in VHS playback.
- The wobble is animated over time using
_TimeParamand_WobbleSpeed.
float wobble = sin(uv.y * _WobbleFrequency + _TimeParam * _WobbleSpeed) * _Distortion * 0.02;
float2 distortedUV = uv + float2(wobble, 0);
col.rgb = lerp(col.rgb, tex2D(_MainTex, distortedUV).rgb, _Distortion);
4. Return Final Color
After applying all enabled effects, the shader outputs the final pixel color, which produces a convincing VHS-style distortion and retro vibe. The complete shader code is also available on GitHub:
Shader "Custom/VHSEffect"
{
    Properties
    {
        _MainTex ("Render Texture", 2D) = "white" {}
        _ScanlineIntensity ("Scanline Intensity", Range(0,4)) = 0.5
        _NoiseIntensity ("Noise Intensity", Range(0,2)) = 0.2
        _ColorBleed ("Color Bleed", Range(0,10)) = 0.02
        _Distortion ("Distortion", Range(0,10)) = 0.05
        _WobbleFrequency ("Wobble Frequency", Range(0,110)) = 40
        _WobbleSpeed ("Wobble Speed", Range(0,20)) = 1
        _TimeParam ("Time", Float) = 0
    }
    SubShader
    {
        Tags
        {
            "RenderType"="Opaque"
        }
        LOD 100

        Pass
        {
            CGPROGRAM
            #pragma vertex vert
            #pragma fragment frag
            #include "UnityCG.cginc"

            struct appdata
            {
                float4 vertex : POSITION;
                float2 uv : TEXCOORD0;
            };

            struct v2f
            {
                float2 uv : TEXCOORD0;
                float4 vertex : SV_POSITION;
            };

            sampler2D _MainTex;
            float4 _MainTex_ST;
            float _ScanlineIntensity;
            float _NoiseIntensity;
            float _ColorBleed;
            float _Distortion;
            float _WobbleFrequency;
            float _WobbleSpeed;
            float _TimeParam;

            v2f vert(appdata v)
            {
                v2f o;
                o.vertex = UnityObjectToClipPos(v.vertex);
                o.uv = TRANSFORM_TEX(v.uv, _MainTex);
                return o;
            }

            float rand(float2 co)
            {
                return frac(sin(dot(co.xy, float2(12.9898, 78.233))) * 43758.5453);
            }

            fixed4 frag(v2f i) : SV_Target
            {
                float2 uv = i.uv;
                fixed4 col = tex2D(_MainTex, uv);

                // 1. Scanlines
                float scanline = sin(uv.y * _ScreenParams.y * 3.14159);
                float scanlineMask = lerp(1.0, 0.7, (scanline * 0.5 + 0.5) * _ScanlineIntensity);
                col.rgb *= scanlineMask;

                // 2. Basic Color Grading (slight desaturation and blue tint)
                float gray = dot(col.rgb, float3(0.3, 0.59, 0.11));
                col.rgb = lerp(col.rgb, float3(gray, gray, gray), 0.15);
                col.rgb = lerp(col.rgb, float3(0.9, 0.95, 1.1), 0.08);

                // 3. Color Bleed/Chromatic Aberration
                float brightness = dot(col.rgb, float3(0.3, 0.59, 0.11));
                float blendAmount = _ColorBleed * smoothstep(0.05, 0.2, brightness);
                float2 offset = float2(_ColorBleed / _ScreenParams.x, 0);
                float r = tex2D(_MainTex, uv + offset).r;
                float g = col.g;
                float b = tex2D(_MainTex, uv - offset).b;
                float3 aberrated = float3(r, g, b);
                col.rgb = lerp(col.rgb, aberrated, blendAmount);

                // 4. Noise/Static
                float noise = (rand(uv * _TimeParam * 0.5 + _TimeParam) - 0.5) * _NoiseIntensity;
                col.rgb += noise;

                // 5. Distortion/Wobble
                float wobble = sin(uv.y * _WobbleFrequency + _TimeParam * _WobbleSpeed) * _Distortion * 0.02;
                float2 distortedUV = uv + float2(wobble, 0);
                col.rgb = lerp(col.rgb, tex2D(_MainTex, distortedUV).rgb, _Distortion);

                return col;
            }
            ENDCG
        }
    }
}
Summary
This shader layers multiple subtle effects: scanlines, color grading, chromatic aberration, noise, and wobble, each customizable via properties, to recreate the nostalgic look and feel of VHS tapes.

Alexey Merzlikin
Experienced game developer and tech lead with a passion for writing educational content about game development and programming. I have over 10 years of industry experience focused on performance optimization, clean code practices, and robust game architecture. I share regular posts on my Telegram channel about applying software engineering best practices to build high-quality games. My goal is to help other game developers level up their skills.
Leave a Reply